Understanding the fundamentals of electrical wiring is crucial for anyone looking to install electrical outlets and switches safely and effectively. Whether you are a seasoned Electrical Wiring Installer or a DIY enthusiast, grasping the basics of electrical systems will not only enhance your skills but also ensure the safety of your home and its occupants. Proper installation techniques can prevent hazards such as electrical fires and shock, making it imperative to follow established guidelines. Before diving into the specifics of outlet installation and switch placement, it’s essential to familiarize yourself with key concepts such as voltage, amperage, and circuit types. Understanding these elements will help you determine the appropriate materials and methods for your project.
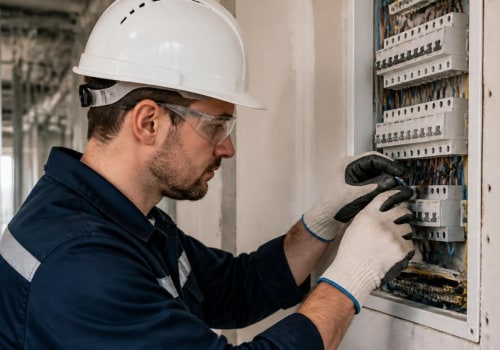
Additionally, adhering to local building codes and regulations is vital, as these standards are designed to protect both you and your property. Safety should always be your top priority when working with electricity. Always turn off power at the circuit breaker before beginning any installation work, and use insulated tools to minimize the risk of shock. Furthermore, wearing personal protective equipment (PPE) such as gloves and goggles can provide an extra layer of safety. By laying this groundwork, you will be well-prepared to explore the best practices for installing electrical outlets and switches in subsequent sections.
Tools and Materials Needed for Installation
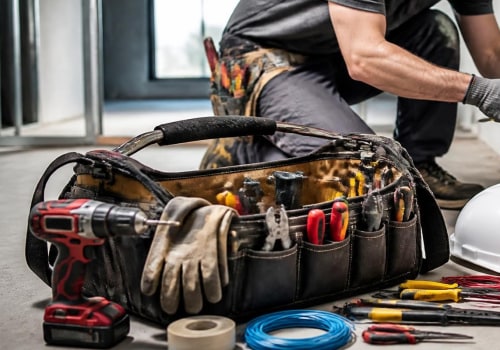
When embarking on a project to install electrical outlets and switches, having the right tools and materials is crucial for ensuring safety and efficiency.Below is a comprehensive list of what you will need to successfully complete your installation.
Essential Tools for Electrical Installation
- Screwdrivers: A set of both flathead and Phillips screwdrivers is essential for securing outlets and switches.
- Pliers: Needle-nose pliers are particularly useful for bending and twisting wires.
- Wire Strippers: These are necessary for removing insulation from electrical wires without damaging the conductor.
- Voltage Tester: A non-contact voltage tester helps ensure that the power is off before you begin working.
- Cable Cutters: These are used to cut through electrical cables cleanly and safely.
- Tape Measure: Accurate measurements are vital for proper placement of outlets and switches.
- Drill: A power drill may be needed for creating holes in walls or securing boxes.
Materials Needed for Outlets and Switches
- Electrical Boxes: These enclosures house the outlets and switches, providing protection and support.
- Outlets: Choose between standard, GFCI, or AFCI outlets based on your needs.
- Switches: Select the appropriate type of switch, such as single-pole or three-way, depending on your circuit requirements.
- Cable/Wire: Use the correct gauge wire (typically 12 or 14 gauge) suitable for your circuit's amperage.
- Wire Nuts: These connectors are essential for securely joining multiple wires together.
- Electrical Tape: This is used to insulate wire connections and prevent short circuits.
Planning Your Electrical Outlet and Switch Layout
When planning your electrical outlet and switch layout, it’s essential to consider both functionality and convenience. A well-thought-out layout can significantly enhance the usability of your space, whether it’s a home or an office.Outlet Placement Guidelines
- Living Areas: In living rooms and family rooms, outlets should be placed every 12 feet along walls to accommodate various devices like lamps, televisions, and chargers.
- Bedrooms: Ensure that outlets are located near the bed for easy access to lamps and charging devices. Consider placing outlets on both sides of the bed.
- Kitchens: Install outlets above countertops every 4 feet to ensure that appliances can be plugged in without stretching cords across surfaces.
- Bathrooms: Place GFCI (Ground Fault Circuit Interrupter) outlets near sinks to prevent electrical hazards while using hairdryers or electric shavers.
Switch Placement Tips
- Entry Points: Light switches should be located at each entry point of a room for easy access.
This is particularly important for high-traffic areas.
- Height Considerations: Standard switch height is typically 48 inches from the floor. However, consider adjusting this for accessibility if needed.
- Multi-Way Switching: For larger rooms or hallways, consider installing three-way or four-way switches to control lighting from multiple locations.
Electrical Layout Planning
A comprehensive plan should also take into account the overall electrical load. Ensure that circuits are not overloaded by calculating the total wattage of devices that will be used. Consulting with a professional Electrical Wiring Installer can provide insights into optimal circuit design and safety standards.By following these guidelines, you can create a practical and efficient layout for your electrical outlets and switches that meets your needs while adhering to safety regulations.
Step-by-Step Guide to Installing Electrical Switches
Installing electrical switches is a crucial skill for any Electrical Wiring Installer.Proper installation ensures safety and functionality in your home. Follow these detailed steps to successfully install a switch.
- Gather Your Tools and Materials: Before starting, ensure you have the necessary tools: a screwdriver, wire stripper, voltage tester, and the new switch. Additionally, make sure you have electrical tape and wire connectors on hand.
- Turn Off Power: Safety first! Locate your circuit breaker and turn off the power to the circuit where you will be working. Use a voltage tester to confirm that the power is off.
- Remove the Old Switch: If you are replacing an existing switch, carefully remove the cover plate using a screwdriver.
Unscrew the switch from the electrical box and gently pull it out to expose the wires.
- Identify Wires: Typically, you will find three wires: a black (hot) wire, a white (neutral) wire, and a green or bare (ground) wire. Take note of how they are connected to the old switch.
- Connect the New Switch: Attach the wires to the new switch in the same configuration as they were on the old one. Connect the black wire to one terminal and the other black wire (if present) to the second terminal. Connect the ground wire to the green screw on the switch.
- Secure Everything: Carefully push the wires back into the electrical box and secure the switch with screws.
Replace the cover plate to finish up.
- Restore Power: Go back to your circuit breaker and turn on the power. Test your new switch by flipping it on and off to ensure it operates correctly.
Common Mistakes to Avoid During Installation
When it comes to installing electrical outlets and switches, even seasoned Electrical Wiring Installers can make mistakes that lead to safety hazards or functionality issues. Here are some common pitfalls to avoid:- Neglecting Local Codes: Always check local building codes before starting your installation.
Failing to comply can result in fines and unsafe conditions.
- Incorrect Wiring: One of the most frequent errors is miswiring outlets and switches. Ensure that you connect the hot, neutral, and ground wires correctly. A reversed connection can lead to shock hazards.
- Overloading Circuits: Installing too many outlets on a single circuit can cause overheating and potential fire risks. Be mindful of the load each circuit can handle.
- Improper Box Placement: Ensure that electrical boxes are securely mounted and at the correct height.
Boxes that are too low or high can make it difficult to access switches and outlets.
- Ignoring Grounding: Proper grounding is essential for safety. Always connect the ground wire to the outlet or switch to prevent electrical shock.
- Using Incorrect Tools: Using the wrong tools can lead to damage or improper installation. Invest in quality tools designed for electrical work.
Safety Tips for Working with Electrical Wiring
When it comes to installing electrical outlets and switches, prioritizing safety is paramount.Working with electricity can be hazardous, and adhering to safety tips can significantly reduce the risk of accidents.
- Turn Off Power: Before starting any electrical work, always turn off the power at the circuit breaker. Use a voltage tester to confirm that the power is off before touching any wires.
- Use Proper Tools: Ensure you have the right tools for the job, including insulated screwdrivers, wire strippers, and pliers. Using tools designed for electrical work minimizes the risk of shock.
- Wear Protective Gear: Equip yourself with safety glasses and rubber-soled shoes. This protective gear can help prevent injuries from accidental shocks or falling debris.
- Follow Local Codes: Familiarize yourself with local electrical codes and regulations.
Compliance not only ensures safety but also avoids potential legal issues.
- Avoid Overloading Circuits: Be mindful of the load on each circuit. Overloading can lead to overheating and fires. Always calculate the total wattage of devices connected to a single outlet.
- Use GFCI Outlets: In areas prone to moisture, such as kitchens and bathrooms, install Ground Fault Circuit Interrupter (GFCI) outlets. These outlets cut off power when they detect a ground fault, providing an extra layer of protection.
- Secure Wiring Properly: Ensure that all wiring is secured and protected from damage.
Use conduit or cable clamps as necessary to prevent wear and tear.
When to Call a Professional Electrician
While many homeowners may feel confident tackling basic electrical tasks, there are specific scenarios where hiring a professional electrician is not just advisable but essential for safety and compliance. Understanding when to call in an expert can save you time, money, and potential hazards.Complex Wiring Projects
If your project involves extensive rewiring or the installation of new circuits, it’s best to consult a licensed electrical wiring installer. These tasks often require knowledge of local codes and regulations, which can be complex and vary by location.A professional will ensure that all work meets safety standards.
Upgrading Electrical Panels
Upgrading or replacing an electrical panel is a significant undertaking that should always be handled by a professional. This process involves high voltage and can pose serious risks if not done correctly. A qualified electrician will ensure that the new panel is properly installed and that your home’s electrical system can handle the increased load.Identifying Electrical Issues
If you experience frequent circuit breaker trips, flickering lights, or burning smells from outlets, these are signs of underlying electrical issues that require immediate attention. Attempting to diagnose or fix these problems without proper training can lead to dangerous situations.A professional electrician has the tools and expertise to identify and resolve these issues safely.
Compliance with Local Codes
Electrical work must comply with local building codes to ensure safety and legality. If you’re unsure about the regulations in your area or how they apply to your project, hiring a professional is the best course of action. They will be familiar with the necessary permits and inspections required for your work.DIY vs Professional Wiring
While DIY projects can be rewarding, they come with risks, especially when it comes to electrical work. If you find yourself questioning your ability to complete a task safely or correctly, it’s wise to err on the side of caution and hire a professional.The peace of mind that comes from knowing your home’s electrical system is safe is invaluable.In summary, while some electrical tasks may seem manageable, recognizing your limits is crucial. When in doubt, don’t hesitate to reach out for professional electrical services. Your safety—and that of your home—should always come first.
FAQs About Electrical Outlet and Switch Installation
When it comes to installing electrical outlets and switches, many homeowners have questions. Here are some of the most frequently asked questions regarding electrical outlet and switch installation.What is the standard height for electrical outlets?
The standard height for electrical outlets is typically 12 to 18 inches above the floor.However, this can vary based on local building codes and personal preference. For kitchen countertops, outlets are usually installed 4 to 6 inches above the surface.
How many outlets can be on one circuit?
The National Electrical Code (NEC) allows for a maximum of 12 outlets on a 15-amp circuit and 16 outlets on a 20-amp circuit. However, it’s essential to consider the total load on the circuit to avoid overloading.Can I install an outlet in a bathroom?
Yes, you can install an outlet in a bathroom, but it must be a GFCI (Ground Fault Circuit Interrupter) outlet to protect against electrical shock. GFCI outlets are designed to cut off power when they detect a ground fault.What tools do I need for installing switches?
- Screwdriver: For securing the switch and cover plate.
- Pliers: Useful for bending wires and making connections.
- Wire Strippers: To strip insulation from wires before connecting them.
- Voltage Tester: To ensure that the power is off before starting work.
How do I know if my wiring is up to code?
The best way to ensure your wiring is up to code is to consult with a licensed electrical wiring installer.They can assess your current setup and make recommendations based on local codes and safety standards.If you have more specific questions or concerns about your electrical installations, it's always best to consult with a professional electrician who can provide tailored advice and solutions.